How do I troubleshoot image distortion on a sewer camera?
Leave a message
Hey there! As a supplier of sewer cameras, I often get asked about troubleshooting image distortion. It's a common issue that can really throw a wrench in your sewer inspection plans. So, let's dive into how you can fix those pesky distorted images on your sewer camera.
First off, let's understand what might be causing the image distortion. There are a few common culprits, and knowing what they are can help you zero in on the solution.
1. Camera Lens Issues
The camera lens is like the eye of your sewer camera. If it's dirty, scratched, or damaged, it can cause all sorts of image problems. Dirt and debris can build up on the lens, especially when the camera is used in a sewer environment. This can make the image look blurry or hazy.
To check if the lens is the problem, take a close look at it. If you see any dirt or smudges, you can clean it gently with a soft, lint - free cloth. Be careful not to scratch the lens while cleaning. If there are deep scratches or damage, you might need to replace the lens. You can find replacement lenses for most sewer cameras from your supplier.
2. Lighting Problems
Proper lighting is crucial for clear images in a sewer environment. If the lighting on your sewer camera is too bright or too dim, it can lead to image distortion. For example, if the light is too bright, it can cause overexposure, making the image look washed out. On the other hand, if it's too dim, the image will be dark and hard to see.
Most modern sewer cameras have adjustable lighting settings. You can try adjusting the brightness of the lights on your camera. Start by turning the lights down if the image is overexposed. If it's too dark, gradually increase the light intensity until you get a clear image.
Some sewer cameras also come with different types of lighting, such as white light or infrared light. You might want to experiment with different lighting types to see which one works best for your specific inspection. For instance, infrared light can be useful in situations where there is a lot of debris in the sewer, as it can penetrate better.
3. Cable and Connection Issues
The cable that connects the camera to the control unit is another area where problems can occur. A damaged cable or a loose connection can disrupt the signal between the camera and the control unit, resulting in image distortion.
Inspect the cable for any visible signs of damage, like cuts, frays, or kinks. If you find any damage, you'll need to replace the cable. It's also a good idea to check the connections at both ends of the cable. Make sure they are securely plugged in. Sometimes, just unplugging and plugging the cable back in can fix a loose connection issue.


4. Camera Settings
Your sewer camera might have a variety of settings that can affect the image quality. Things like resolution, contrast, and color balance can all be adjusted. If these settings are not configured correctly, it can lead to image distortion.
Check the camera's menu and make sure the resolution is set to the highest possible value that your system can handle. Adjust the contrast and color balance to get a more natural - looking image. You can also try resetting the camera settings to their default values if you're not sure what the correct settings should be.
5. Environmental Factors
The sewer environment itself can cause image distortion. There might be a lot of sediment, water turbulence, or chemicals in the sewer that can affect the camera's performance.
If there is a lot of sediment in the water, it can make the image look murky. You can try using a water - jet attachment on your sewer camera to clear the sediment around the camera. This can help improve the image quality.
Water turbulence can also cause the camera to shake, resulting in blurry images. In this case, you might need to slow down the movement of the camera or use a stabilizer if your camera has one.
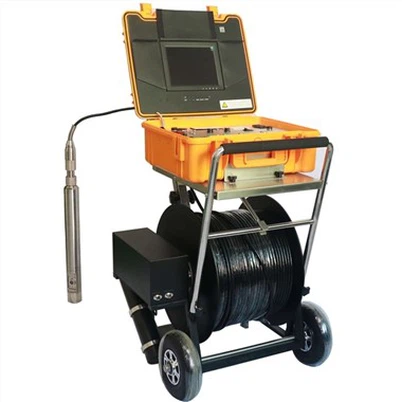
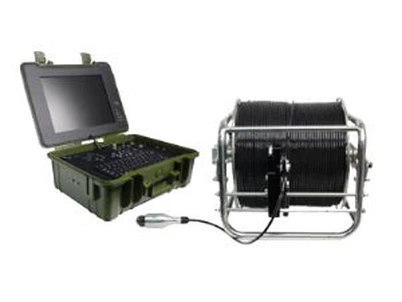
Using the Right Equipment
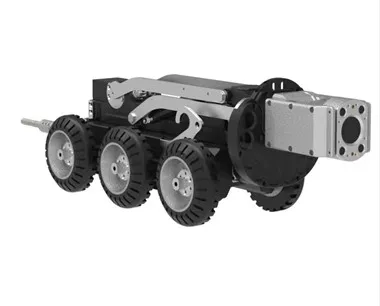
As a sewer camera supplier, I always recommend using high - quality equipment. For example, our Factory Borehole Water Well Camera is designed to provide clear images even in challenging environments. It has a robust construction and advanced features that can help reduce the chances of image distortion.
Another great option is our Underwater dual view borescope inspection camera. This camera offers dual - view capabilities, which can be very useful for getting a better perspective of the sewer. And our Borewell Inspection Camera is specifically designed for borewell inspections, with features that ensure clear and accurate imaging.
When to Seek Professional Help
If you've tried all the troubleshooting steps above and you're still experiencing image distortion, it might be time to seek professional help. Sometimes, there could be an internal problem with the camera that requires specialized knowledge and tools to fix.
You can contact your sewer camera supplier for further assistance. They can either guide you through more advanced troubleshooting steps or arrange for a technician to come and take a look at your camera.
Conclusion
Troubleshooting image distortion on a sewer camera can be a bit of a challenge, but with the right approach, you can usually get the problem sorted out. By checking the camera lens, lighting, cable, settings, and considering the environmental factors, you can improve the image quality of your sewer camera.
If you're in the market for a new sewer camera or need replacement parts, don't hesitate to reach out. We're here to help you find the best solution for your sewer inspection needs. Whether you're a professional plumber or a DIY enthusiast, having a reliable sewer camera is essential for accurate inspections. So, let's start a conversation and see how we can assist you with your next project.
References
- General knowledge from years of experience in the sewer camera industry.
- Manufacturer's manuals for various sewer camera models.