
How do I test the functionality of a new pipe camera?
Leave a message

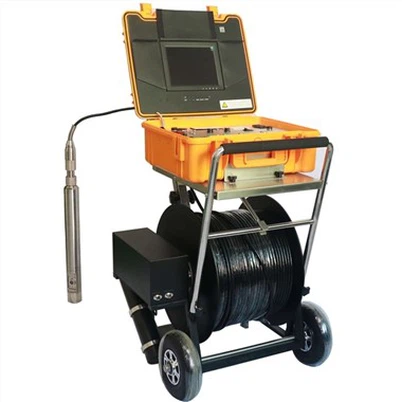
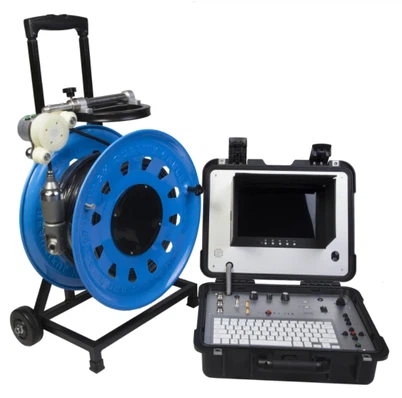
As a reputable pipe camera supplier, ensuring the functionality of our products is of utmost importance. A reliable pipe camera is essential for various industries, including plumbing, construction, and environmental inspection. In this blog, I will share the comprehensive process I follow to test the functionality of a new pipe camera.
1. Pre - test Preparation
Before diving into the actual testing, thorough preparation is necessary. First, I gather all the required tools and equipment. This includes the pipe camera itself, a power source (usually a battery or an AC adapter), a monitor or a display device to view the footage, and any additional accessories such as cables and connectors.
I also inspect the physical condition of the pipe camera. Check for any visible damages on the camera head, the cable, and the control unit. A damaged cable might affect the transmission of the video signal, and a scratched camera lens can result in a blurry image.
Next, I ensure that the software or the operating system of the pipe camera is up - to - date. Outdated software can lead to glitches and improper functioning. I follow the manufacturer's instructions to download and install the latest updates if available.
2. Power and Connectivity Testing
The first step in the functionality test is to check the power supply. I connect the pipe camera to the power source and observe if the power indicator lights up. If it doesn't, I check the power cable and the battery (if applicable). Sometimes, a loose connection or a depleted battery can cause the camera not to power on.
After confirming that the camera is powered, I test the connectivity between the camera and the display device. I use the appropriate cables to connect the two. For example, if it's a digital pipe camera, I might use an HDMI cable. Once connected, I turn on the display device and look for the camera's video output. If there is no image on the screen, I check the cable connections again, and also verify the input settings on the display device.
3. Image and Video Quality Testing
The core function of a pipe camera is to capture clear and accurate images and videos inside pipes. To test the image quality, I start by placing the camera in a well - lit environment. I check for sharpness, color accuracy, and contrast. A good pipe camera should produce images that are sharp enough to distinguish small details such as cracks, rust, or debris inside the pipe.
I also test the camera's ability to adjust to different lighting conditions. I move the camera to areas with varying levels of light, including dimly lit sections. The camera should be able to automatically adjust its exposure settings to produce clear images. Some high - end pipe cameras have manual exposure controls, and I test these functions as well to ensure they work properly.
For video quality, I record short video clips while moving the camera around. I check for smoothness of the video playback. Any stuttering or frame drops can indicate problems with the camera's video recording capabilities. I also look for artifacts or noise in the video, which can be caused by a faulty sensor or a problem with the video processing unit.
4. Movement and Maneuverability Testing
Pipe cameras often need to be maneuvered inside pipes to reach different areas. I test the camera's movement capabilities. If it has a flexible cable, I check how easily it can be bent and curved without causing any damage to the internal components. I also test the camera's ability to rotate and tilt. This is important for getting a full view of the pipe's interior.
Some pipe cameras come with a pan - tilt function. I test this by using the control unit to pan the camera left and right, and tilt it up and down. The movement should be smooth and responsive. If the camera gets stuck or doesn't move as expected, it might have a mechanical issue.
5. Focus and Zoom Testing
Many modern pipe cameras are equipped with focus and zoom functions. To test the focus, I place objects at different distances from the camera and check if it can automatically focus on them. I also test the manual focus function (if available) to see if I can adjust the focus according to my needs.
For the zoom function, I use the control unit to zoom in and out. The image should remain clear and sharp during the zoom operation. If the image becomes blurry or distorted when zooming, it indicates a problem with the zoom mechanism or the lens.
6. Durability and Resistance Testing
Pipes can be harsh environments, with factors such as moisture, chemicals, and physical impacts. To test the camera's durability, I simulate some of these conditions. For moisture resistance, I might expose the camera to a controlled amount of water mist. The camera should continue to function properly without any signs of water damage.
I also test the camera's resistance to chemicals. I use mild cleaning agents that are commonly used in pipe maintenance to wipe the camera's surface. The camera should not show any signs of corrosion or damage after the cleaning.
In terms of physical impact resistance, I perform a drop test (from a small height as per safety standards). The camera should be able to withstand minor bumps and drops without losing its functionality.
7. Special Features Testing
Some pipe cameras come with special features such as Underwater dual view borescope inspection camera. If the new pipe camera has such features, I test them thoroughly. For example, if it's an underwater camera, I test its ability to function properly underwater. I submerge the camera in a water tank and check the image and video quality underwater.
Other special features might include measurement functions. Some pipe cameras can measure the diameter of the pipe or the length of a crack. I test these functions by using known - size objects and comparing the camera's measurements with the actual values.
8. Long - term and Continuous Use Testing
To ensure the reliability of the pipe camera in real - world applications, I conduct long - term and continuous use testing. I run the camera for an extended period, usually several hours, and monitor its performance. I check for any signs of overheating, as excessive heat can damage the internal components.
During the long - term test, I also look for any degradation in the image or video quality. Sometimes, a camera might work well initially but start to show problems after continuous use.
Conclusion
Testing the functionality of a new pipe camera is a comprehensive process that involves multiple steps. By following these steps, I can ensure that the pipe cameras we supply are of high quality and can meet the needs of our customers.
If you are in the market for a reliable pipe camera, whether it's a Factory Borehole Water Well Camera or a Borewell Inspection Camera, we are here to provide you with the best products. We welcome you to contact us for further details and to discuss your specific requirements. Our team of experts is ready to assist you in finding the most suitable pipe camera for your applications.


References
- Manufacturer's manuals of various pipe cameras
- Industry standards for pipe camera testing and quality control