How do I verify the integrity of a pipe using a pipe camera?
Leave a message
Verifying the integrity of a pipe is a crucial task in various industries, including plumbing, construction, and environmental monitoring. A pipe camera is an invaluable tool for this purpose, allowing for a detailed inspection of the interior of pipes without the need for extensive excavation or disassembly. As a pipe camera supplier, I have witnessed firsthand the effectiveness of these devices in ensuring the safety and functionality of pipe systems. In this blog post, I will share some insights on how to use a pipe camera to verify the integrity of a pipe.
Understanding the Basics of Pipe Cameras
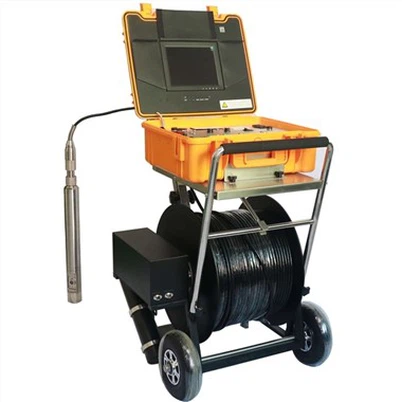
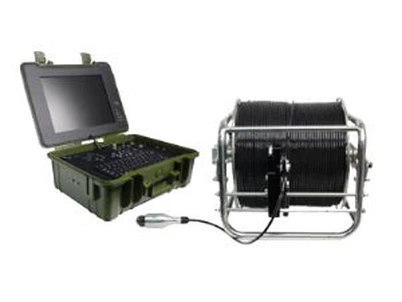
Before delving into the verification process, it's important to understand the basic components and functionality of a pipe camera. A typical pipe camera system consists of a camera head, a flexible cable, a monitor, and a control unit. The camera head is designed to be inserted into the pipe and can capture high-resolution images and videos of the pipe's interior. The flexible cable allows the camera to be maneuvered through the pipe, while the monitor displays the captured footage in real-time. The control unit provides the user with the ability to adjust the camera settings, such as zoom, focus, and lighting.


Preparing for the Inspection
Proper preparation is key to a successful pipe inspection. Here are some steps to take before using the pipe camera:
- Identify the Pipe Location and Access Points: Determine the exact location of the pipe and identify any access points, such as cleanouts, manholes, or service tees. This will help you plan the insertion route for the camera.
- Clean the Pipe: Remove any debris, sediment, or blockages from the pipe to ensure clear visibility. You can use a pipe cleaner, a high-pressure water jet, or other appropriate cleaning methods.
- Check the Camera System: Inspect the pipe camera system to ensure that all components are in working condition. Test the camera, monitor, and control unit to make sure they are functioning properly.
- Choose the Right Camera: Select a pipe camera that is suitable for the size and type of pipe you are inspecting. Consider factors such as camera diameter, length of the cable, and the resolution of the images and videos.
Inserting the Camera into the Pipe
Once you have prepared the pipe and the camera system, it's time to insert the camera into the pipe. Here are some tips to follow:
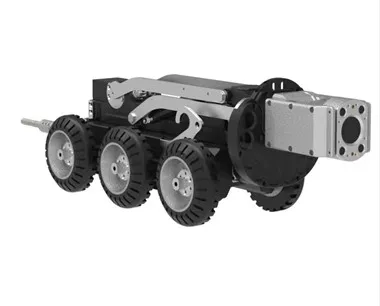
- Use a Guide: To ensure that the camera is inserted smoothly and accurately, use a guide, such as a push rod or a reel. This will help you control the direction and depth of the camera.
- Start Slowly: Begin inserting the camera into the pipe at a slow and steady pace. This will allow you to monitor the footage and make any necessary adjustments.
- Watch the Monitor: Keep a close eye on the monitor to observe the condition of the pipe. Look for any signs of damage, such as cracks, leaks, corrosion, or blockages.
- Take Notes and Recordings: As you inspect the pipe, take notes and record any significant findings. This will help you document the condition of the pipe and provide a detailed report to your clients.
Analyzing the Footage
After the camera has been inserted into the pipe and the inspection is complete, it's time to analyze the footage. Here are some steps to take:
- Review the Footage: Watch the recorded footage carefully to identify any areas of concern. Look for signs of damage, such as cracks, leaks, corrosion, or blockages.
- Measure the Damage: If you notice any damage to the pipe, measure the size and extent of the damage. This will help you determine the appropriate repair or replacement options.
- Compare with Previous Inspections: If you have conducted previous inspections of the same pipe, compare the current footage with the previous recordings. This will help you track the progress of any existing damage and identify any new issues.
- Generate a Report: Based on your analysis of the footage, generate a detailed report that includes your findings, recommendations, and any necessary repair or replacement options. This report will be useful for your clients and for future reference.
Using Specialized Pipe Cameras for Specific Applications
In addition to standard pipe cameras, there are also specialized cameras available for specific applications. For example, Borewell Inspection Camera are designed for inspecting borewells and other deep wells. These cameras are typically equipped with high-intensity lighting and a waterproof housing to withstand the harsh conditions of underground environments.
Similarly, Borehole Inspection Camera are used for inspecting boreholes and other vertical pipes. These cameras are often equipped with a pan-and-tilt mechanism to allow for a more comprehensive inspection of the pipe's interior.
For those in need of a reliable camera for borehole water well inspection, the Factory Borehole Water Well Camera is an excellent choice. This camera is specifically designed for use in water wells and offers high-resolution imaging and advanced features for accurate inspection.
Conclusion
Verifying the integrity of a pipe using a pipe camera is a cost-effective and efficient way to ensure the safety and functionality of pipe systems. By following the steps outlined in this blog post, you can conduct a thorough inspection of the pipe and identify any potential issues before they become major problems. As a pipe camera supplier, I am committed to providing high-quality products and excellent customer service. If you have any questions or need assistance with your pipe inspection needs, please do not hesitate to contact me. I look forward to working with you to ensure the integrity of your pipe systems.
References
- ASME (American Society of Mechanical Engineers). (2019). B31.3 Process Piping Code.
- ASTM (American Society for Testing and Materials). (2020). Standard Practice for Visual Inspection of Piping Systems.
- NACE International. (2018). Pipeline External Corrosion Direct Assessment Methodology.