
How do I transfer images from a snake camera to a computer?
Leave a message

Hey there! As a snake camera supplier, I get a lot of questions about how to transfer images from a snake camera to a computer. It's a common concern, especially for those who use snake cameras for various inspection tasks, like plumbing or industrial inspections. In this blog post, I'll walk you through the process step by step, so you can easily get those images from your snake camera onto your computer.
Understanding Your Snake Camera
First things first, it's important to know what kind of snake camera you have. There are different types of snake cameras out there, and the transfer method can vary depending on the model. Some snake cameras come with built - in Wi - Fi capabilities, while others use a USB connection.


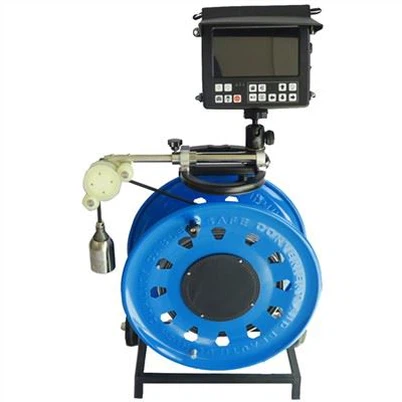
If you're using a 100m LED Adjustable Pipe Camera Pipe Camera Plumbing Pipe Inspection Sewer Camera, it might have a specific way of transferring images. This camera is great for long - range pipe inspections, and knowing how to get the images off it is crucial for your work.
Transferring Images via USB
One of the most common ways to transfer images from a snake camera to a computer is through a USB connection. Here's how you can do it:
- Check the camera's USB port: Make sure your snake camera has a USB port. Most modern snake cameras are equipped with one. If your camera is the Snake Camera WiFi Inspection Camera Endoscope, it might have both a USB option and a Wi - Fi option for image transfer.
- Connect the camera to the computer: Use a USB cable to connect your snake camera to your computer. Plug one end of the cable into the camera's USB port and the other end into an available USB port on your computer.
- Wait for the computer to recognize the camera: Once the connection is made, your computer should detect the snake camera as an external storage device. This might take a few seconds. You'll usually see a notification on your computer indicating that a new device has been connected.
- Access the camera's storage: Open the "My Computer" (on Windows) or "Finder" (on Mac) application. You should see the snake camera listed as an external drive. Double - click on it to open the camera's storage.
- Locate the image files: Inside the camera's storage, you'll find the image files. They are usually in a folder named something like "DCIM" or "Images". Navigate to this folder and select the images you want to transfer.
- Copy the images to your computer: Right - click on the selected images and choose "Copy". Then, open a folder on your computer where you want to save the images, right - click inside the folder, and choose "Paste".
Transferring Images via Wi - Fi
If your snake camera has Wi - Fi capabilities, transferring images can be even more convenient. Here's how:
- Set up the Wi - Fi connection: Turn on your snake camera and put it in Wi - Fi mode. On your computer, search for available Wi - Fi networks. You should see the network name of your snake camera. Connect to it.
- Open the camera's app or web interface: Some snake cameras come with a dedicated app that you can download from the app store. Others can be accessed through a web browser. If your camera is the Pan Tilt Drain Sewer Inspection Camera, it might have a user - friendly app for easy image transfer.
- Log in to the camera: If required, enter the password for the camera's Wi - Fi network. Once you're logged in, you'll be able to access the camera's settings and view the images.
- Select and transfer the images: Navigate to the image gallery on the camera's app or web interface. Select the images you want to transfer. Then, choose the option to download or transfer the images to your computer.
Troubleshooting
Sometimes, things don't go as smoothly as we'd like. Here are some common issues and how to fix them:
- Connection problems: If your computer doesn't recognize the snake camera when connected via USB, try using a different USB cable or a different USB port on your computer. If the Wi - Fi connection isn't working, make sure the camera's Wi - Fi is turned on and that you're entering the correct password.
- Image file format issues: Some snake cameras save images in proprietary file formats. If you're having trouble opening the images on your computer, try using a software that can handle those file formats. You can also try converting the images to a more common format like JPEG.
- Storage space issues: If your snake camera's storage is full, you won't be able to take new images or transfer existing ones. Delete some old images from the camera's storage to free up space.
Conclusion
Transferring images from a snake camera to a computer is not as complicated as it might seem. Whether you're using a USB connection or Wi - Fi, following the steps above should help you get your images onto your computer without any hassle.
If you're in the market for a new snake camera or need more information about our products, don't hesitate to reach out. We're here to help you with all your inspection camera needs. Contact us to discuss your requirements and start a purchase negotiation.
References
- General knowledge about snake cameras and image transfer.
- Product manuals of the mentioned snake cameras.