How do I record the footage from a pipe camera?
Leave a message
Recording footage from a pipe camera is a crucial process for various industries, including plumbing, construction, and environmental inspection. As a professional pipe camera supplier, I understand the importance of high - quality recording and the factors that contribute to a successful recording. In this blog, I will share some detailed steps and tips on how to record the footage from a pipe camera effectively.
1. Preparation before Recording
Selecting the Right Pipe Camera
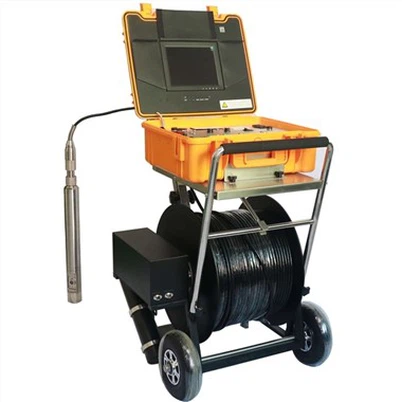
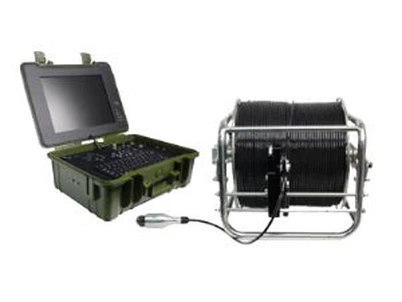
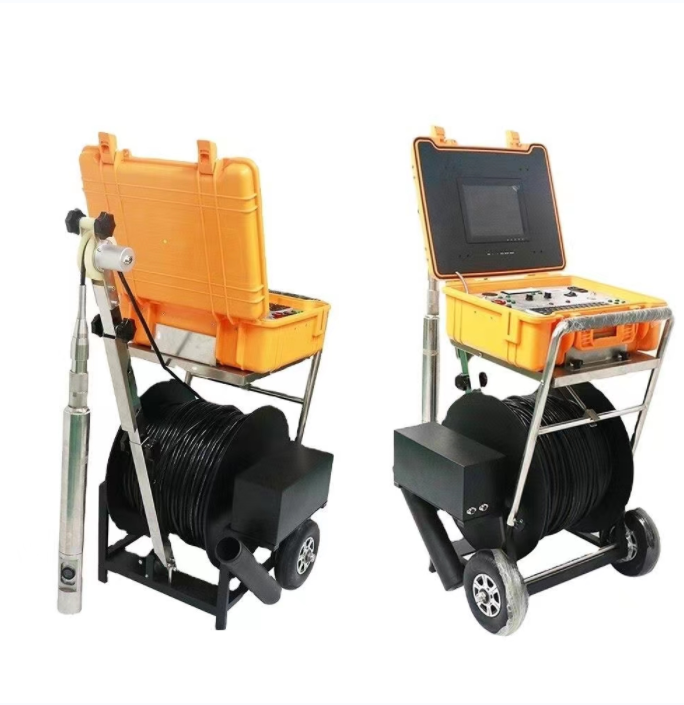
The first step is to choose a pipe camera that suits your specific needs. We offer a wide range of pipe cameras, such as the Borehole Water Well Camera, which is designed for inspecting water wells and boreholes. It has high - resolution imaging capabilities and can withstand harsh underwater environments. The Flexible Cable Industrial Borehole Camera is another great option. Its flexible cable allows it to navigate through complex pipe systems easily.
Checking Camera Equipment
Before starting the recording, thoroughly check the camera equipment. Inspect the camera lens for any dirt, scratches, or damage. A dirty or damaged lens can significantly affect the quality of the footage. Clean the lens gently with a soft, lint - free cloth. Also, check the cable for any signs of wear and tear. Ensure that all connections are secure, including the connection between the camera and the recording device.
Preparing the Recording Device
The recording device can be a dedicated video recorder or a computer with appropriate software. Make sure the recording device has enough storage space to store the footage. Format the storage device if necessary. If you are using software, install the latest version to ensure compatibility and optimal performance.

2. Setting up the Pipe Camera
Positioning the Camera
Carefully insert the pipe camera into the pipe. Start at the entry point of the pipe and slowly feed the cable into the pipe. Use the camera's controls to adjust the orientation and angle of the camera. For example, if you are inspecting a vertical pipe, make sure the camera is pointed straight down to get a clear view of the pipe walls. In a horizontal pipe, position the camera to capture the entire cross - section of the pipe.
Lighting Adjustment
Proper lighting is essential for clear footage. Most pipe cameras are equipped with built - in lights. Adjust the brightness of the lights according to the conditions inside the pipe. In a dark pipe, increase the light intensity. However, be careful not to over - illuminate, as this can cause glare and reduce the visibility of details.
3. Recording Process
Starting the Recording
Once the camera is properly positioned and the lighting is adjusted, start the recording on the recording device. Make sure to record continuously to capture all the relevant information. If you are using a computer - based recording system, you can use the software's features to mark important points in the footage for easy reference later.
Moving the Camera
Slowly move the camera through the pipe while recording. Avoid sudden movements, as this can cause blurry footage. Use the camera's controls to move the camera forward, backward, up, or down. If the pipe has bends or curves, use the flexible cable to navigate smoothly. Take your time to inspect every part of the pipe carefully.
Capturing Details
Pay attention to details such as cracks, leaks, blockages, or corrosion inside the pipe. When you spot something significant, pause the camera briefly to capture a clear and detailed image. You can also use the zoom function of the camera to get a closer look at the problem area.
4. Post - recording Processing
Reviewing the Footage
After the recording is completed, review the footage on the recording device. Check for any issues such as blurry images, poor lighting, or missing details. If necessary, you can go back and re - record the areas that need improvement.
Saving and Organizing the Footage
Save the footage in a secure location. You can create a folder structure to organize the footage based on the date, location, or type of inspection. This will make it easier to find and access the footage in the future.
Editing the Footage
If required, you can edit the footage to remove any unnecessary parts. You can also add annotations or captions to highlight important findings. There are many video editing software available in the market that can help you with this task.
5. Tips for High - Quality Recording
Regular Maintenance
Regularly maintain your pipe camera equipment. Clean the camera and cable after each use to prevent dirt and debris from accumulating. Lubricate the moving parts of the camera if necessary. This will extend the lifespan of the equipment and ensure consistent performance.
Training Operators
Proper training of operators is crucial for high - quality recording. Train the operators on how to use the camera equipment correctly, including camera positioning, lighting adjustment, and recording techniques. Provide them with guidelines on how to identify and record important details in the pipe.
Using Accessories
Consider using accessories such as additional lights, mirrors, or magnifying lenses to enhance the recording quality. These accessories can help you get a better view of hard - to - reach areas or small details inside the pipe.
Conclusion
Recording footage from a pipe camera is a multi - step process that requires careful preparation, proper equipment setup, and attention to detail. By following the steps and tips outlined in this blog, you can ensure high - quality footage that provides valuable information for pipe inspection. As a pipe camera supplier, we are committed to providing you with the best - quality camera equipment and support. If you are interested in purchasing our pipe cameras or have any questions about pipe camera recording, please feel free to contact us for a detailed discussion and procurement negotiation.
References
- General knowledge of pipe camera technology and inspection procedures.
- Experience from practical use of pipe cameras in various industries.