
How to set up wells camera?
Leave a message

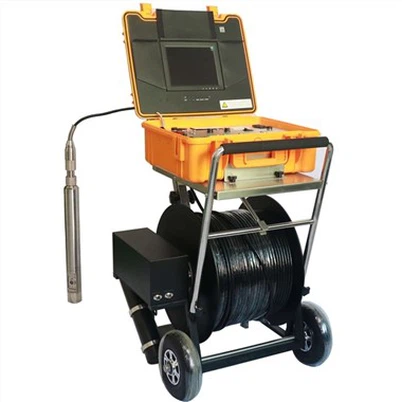
Setting up a wells camera can be a crucial step for various applications, whether it's for borewell inspection, deep - water exploration, or industrial borehole assessment. As a trusted wells camera supplier, I am here to guide you through the process in a detailed and comprehensive manner.
Understanding the Types of Wells Cameras
Before diving into the setup process, it's essential to understand the different types of wells cameras available.
The Borewell Inspection Camera is specifically designed for inspecting borewells. It can help you detect issues such as cracks, blockages, or the presence of foreign objects inside the well. This camera is often compact and can be easily maneuvered through the borewell.
The Borehole Deep Water Inspection Camera is built to withstand the pressure and conditions of deep - water boreholes. It has enhanced waterproof capabilities and can provide clear images even in low - light, high - pressure environments.
The Flexible Cable Industrial Borehole Camera features a flexible cable, which allows it to navigate through complex and irregularly shaped boreholes. This type of camera is ideal for industrial applications where boreholes may have bends or non - standard configurations.
Pre - Setup Preparations
Safety First
Safety should always be your top priority when setting up a wells camera. Wear appropriate safety gear, such as hard hats, safety glasses, and gloves. Ensure that the area around the well is clear of any obstacles and that there are no potential hazards. If you are working near an electrical source, make sure to follow all electrical safety protocols.
Gather the Necessary Tools
You will need a few basic tools for the setup process. These may include a spanner or wrench for tightening connections, a measuring tape to determine the depth of the well, and a power source. Depending on the type of camera, you may also need additional tools such as a cable reel or a mounting bracket.
Check the Camera Equipment
Before starting the setup, thoroughly inspect the camera equipment. Check for any visible damage to the camera housing, cable, or connectors. Test the camera to ensure that it is functioning properly. You can do this by connecting the camera to a monitor or recording device and powering it on. Check the image quality and make sure that all functions, such as zoom and focus, are working as expected.
Step - by - Step Setup Process
Step 1: Mount the Camera
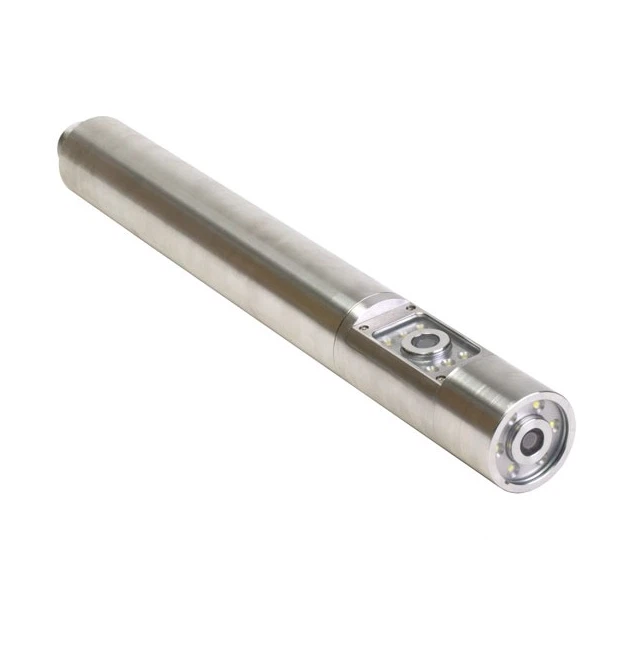
The first step is to mount the camera. If you are using a borewell inspection camera, you may need to attach it to a suitable mounting bracket. Make sure that the camera is securely mounted and that it is positioned in such a way that it can capture the area of interest inside the well. For cameras with a flexible cable, carefully unwind the cable and ensure that it is not tangled.
Step 2: Connect the Camera to the Monitor or Recording Device
Next, connect the camera to a monitor or recording device. This can usually be done using a video cable. Make sure that the connections are tight and secure. If your camera supports wireless connectivity, you may need to pair it with the monitor or recording device according to the manufacturer's instructions.
Step 3: Lower the Camera into the Well
Once the camera is mounted and connected, it's time to lower it into the well. Use a cable reel or a winch to slowly lower the camera. As you lower the camera, pay close attention to the cable to ensure that it does not get caught on any obstacles inside the well. You can use the measuring tape to keep track of the depth of the camera.
Step 4: Power On the Camera and Start Recording
After the camera is at the desired depth, power on the camera and start recording. You can adjust the camera settings, such as brightness, contrast, and focus, to get the best possible image quality. If you are using a camera with additional features, such as a light source, you can turn it on to illuminate the area inside the well.

Step 5: Monitor the Images and Take Notes
As the camera is recording, monitor the images on the monitor or recording device. Look for any signs of damage, blockages, or other issues inside the well. Take notes of what you see, including the location and nature of any problems. You can also take screenshots or record videos for future reference.
Troubleshooting Common Issues
Poor Image Quality
If you are experiencing poor image quality, there could be several reasons. First, check the camera settings to make sure that they are properly adjusted. If the image is too dark, you may need to increase the brightness or turn on the light source. If the image is blurry, try adjusting the focus. Another possible cause could be a dirty camera lens. You can clean the lens using a soft, lint - free cloth.
Cable Tangles
Cable tangles can be a common problem when lowering the camera into the well. To prevent cable tangles, make sure that the cable is properly wound on the cable reel before starting the setup. As you lower the camera, pay close attention to the cable and try to keep it straight. If you encounter a cable tangle, stop lowering the camera immediately and carefully untangle the cable.
Connectivity Issues
If you are having connectivity issues between the camera and the monitor or recording device, check the connections. Make sure that all cables are securely plugged in. If you are using wireless connectivity, check the signal strength and make sure that the devices are properly paired. You may also need to restart the devices to resolve the issue.
Conclusion
Setting up a wells camera is a process that requires careful planning and attention to detail. By following the steps outlined in this guide, you can ensure a successful setup and obtain accurate and useful information from your well inspections. Whether you are using a Borewell Inspection Camera, a Borehole Deep Water Inspection Camera, or a Flexible Cable Industrial Borehole Camera, our high - quality products can meet your specific needs.
If you are interested in purchasing a wells camera or have any questions about the setup process, we encourage you to contact us for a detailed discussion. Our team of experts is ready to assist you in finding the right camera for your application and providing you with the support you need.
References
- General knowledge of wells camera technology and setup procedures.
- Manufacturer's manuals and guidelines for the mentioned types of wells cameras.