How to set up a snake camera for a long - term inspection?
Leave a message
Yo! As a snake camera supplier, I get asked a ton about setting up these nifty devices for long - term inspections. It ain't as tough as it might seem at first, but there are a few key steps you gotta follow. In this blog, I'll walk you through the whole process.
Choosing the Right Snake Camera
First things first, you need to pick the right snake camera for your long - term inspection needs. There are all sorts of options out there, but let me recommend a few top - notch ones.
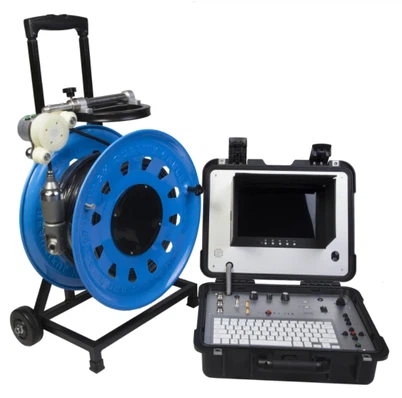
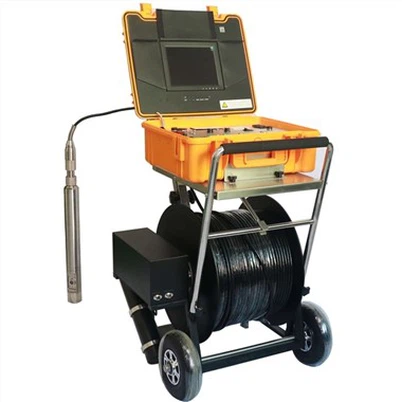
The Portable Pipe Inspection Camera Drain Inspection Camera is a great choice for small - scale and portable use. It's super easy to carry around, and you can use it for checking up on drains and pipes in various locations. If you're dealing with larger sewer systems, the Sewer Drainage Pipe Inspection Camera is a heavy - hitter. This bad boy is made to handle the tough stuff in sewer pipes and can give you a clear view of what's going on deep down. And for those who need a more specialized camera head, the 23mm Camera Head For Pipe Drain Sewer Plumbing Inspection System With Optional Transmitter is a must - have. It can fit into tight spaces and provide high - quality images.
Preparing for Installation
Before you start setting up the snake camera, you gotta do a bit of prep work.
Check the Camera
Give your snake camera a thorough once - over. Make sure the cable is in good condition, no kinks or breaks. Also, check the camera head. Ensure that the lens is clean and the lights are working properly. If there's any dirt or debris on the lens, clean it gently with a soft cloth. A dirty lens can give you a blurry view, and that's no good for inspections.
Plan Your Inspection Route
Figure out where you want to use the snake camera. Map out the pipes or areas you'll be inspecting. This will help you determine how much cable you'll need and where you might encounter obstacles. For example, if you're inspecting a plumbing system in an old building, there could be bends, connections, or even blockages that you need to be aware of.
Gather Other Tools
You'll likely need some other tools to help with the installation. Things like a ladder if you're accessing pipes in high places, a cable guide to help the snake camera move smoothly through the pipes, and of course, a power source. Make sure your camera is fully charged if it's a rechargeable one, or have fresh batteries handy.
Setting Up the Snake Camera
Now comes the fun part—actually setting up the snake camera.
Connect the Camera to the Monitor
Most snake cameras come with a monitor or a device to view the footage. Plug the camera cable into the appropriate port on the monitor. Double - check the connection to make sure it's secure. Sometimes, a loose connection can cause a distorted or no - signal issue.
Attach Any Necessary Accessories
If you've got a camera head with a transmitter, attach it properly. Follow the manufacturer's instructions for this step. Some transmitters need to be positioned in a certain way to work effectively. You might also want to attach the cable guide to the camera cable if you're going to be using it.
Insert the Camera into the Pipe
Slowly and carefully insert the camera head into the pipe or the area you're inspecting. Use the cable guide if needed to help the cable move smoothly. As you insert the camera, keep an eye on the monitor to make sure you're getting a clear view. If you encounter any resistance, stop and try to figure out what's causing it. It could be a blockage or a sharp turn in the pipe.
Conducting a Test Inspection
Once the camera is in place, it's time to do a test run.
Move the Camera
Use the controls on the monitor or the camera itself to move the camera head around. Check different angles and areas in the pipe. Make sure you can see clearly in all directions. If the image on the monitor is too dark, you might need to adjust the camera's lights.
Check the Image Quality
Look closely at the image on the monitor. Is it sharp? Are there any artifacts or glitches? If the image quality is poor, there could be an issue with the camera settings, the cable, or the monitor. Try adjusting the settings on the monitor to see if that improves the situation.
Look for Obstacles
As you move the camera, keep an eye out for any obstacles in the pipe. This could be debris, roots, or even structural damage. Note down the location and appearance of any issues you find. This will be useful for your long - term inspection records.
Long - Term Maintenance
Setting up the snake camera is just the start. For long - term inspections, you need to keep it in good working condition.
Clean the Camera Regularly
After each use, clean the camera head and the cable. Use a mild detergent and a soft cloth to remove any dirt or grime. Make sure the camera is completely dry before storing it. This will prevent corrosion and other damage.
Check the Cable for Wear
Over time, the camera cable can wear out. Inspect it regularly for signs of fraying or damage. If you notice any issues, replace the cable as soon as possible to avoid losing the camera in the pipe.


Update the Software
If your snake camera has software, keep it up - to - date. Software updates can improve the camera's performance and add new features. Check the manufacturer's website regularly for updates and follow the instructions to install them.
Troubleshooting Common Issues
Even with the best setup, you might run into some problems. Here's how to deal with a few common issues.
No Image on the Monitor
If you're not getting an image on the monitor, first check the connections. Make sure the camera cable is plugged into the monitor correctly. Also, check the power source of both the camera and the monitor. If the cables and power are okay, there could be an issue with the camera itself. Try resetting the camera or contact the manufacturer for further assistance.
Blurry or Distorted Image
A blurry or distorted image can be caused by a dirty lens, a loose connection, or incorrect camera settings. Clean the lens, check the connections, and adjust the settings on the monitor. If the problem persists, it might be a hardware issue, and you should get it checked out.
Camera Stuck in the Pipe
If the camera gets stuck in the pipe, don't force it. Try using the cable guide to gently maneuver the camera out. If that doesn't work, you might need to open up the pipe to retrieve the camera. This should be a last resort, as it can be time - consuming and costly.
Wrapping It Up
Setting up a snake camera for long - term inspections is a process, but it's definitely doable. By choosing the right camera, doing the proper prep work, and following the steps for installation and maintenance, you can ensure that your inspections are smooth and effective.
If you're interested in purchasing a high - quality snake camera for your long - term inspection needs, get in touch with me. I'm here to help you find the perfect camera and answer any questions you might have. Let's make your inspection jobs easier and more efficient!
References
- General knowledge from the experience of a snake camera supplier.
- Manufacturer's manuals for the recommended snake cameras.